The gadget performs its functions, but it should be handled with caution. I used to fly high and carefully without the gadget; I started to fly low and at risk, after having installed the gadget; besides, the accidents occur.
1. Servomechanism of the elevator for models of planes and gliders. It is the main scheme of connection for winged aircraft models. Operation of the device is effective both in the repulsion (saving) mode and the altitude holding mode. For models with low-efficiency elevators usable for training, a mode of operation with the maximum response to the parameter of altitude and velocity can be set. For more maneuverable models, the degree of response can be reduced. In the repulsion mode, landing of a model of plane is possible after reducing the velocity of its flying only. For making an automatic landing smoother, the degree of response to the altitude and velocity should be chosen more precisely. On the optimum tuning, if the engine is switched off, the model shall smoothly land in course of reducing the velocity of flying. If the landing angle exceeds 30 degrees, the response of the device can fall behind. The holding mode requires a finer tuning. If your level of controlling skills is not sufficiently high, you should avoid the mode of altitude holding. For tuning the holding mode, the velocity of flying should be moderate: in such a case, flying of the model is stable and it will smoothly go down to the altitude level of 2 m. If waving-like vibrations (sudden jumps up and down) of the model take place, the degree of response should be reduced. If the response of the device is not sufficient and additional actions from the control panel are required, the degree of response should be increased. For flying in the holding mode, a model that is stable in flying with fast servo should be used; any interference that reduces the sensitivity of the device (see the section "Installing and adjusting of the device") should be eliminated. The holding mode automatically holds the model on the altitude level of 1,8 m; to escape from the mode, it is sufficient to increase the altitude. The trimmer on the control panel allows reducing the held altitude to a certain degree. Flying on a low altitude is bound with a high risk of a wreck - please, take into account this circumstance and do not rely fully on the device only. The holding mode will not operate correctly over an uneven surface, for example, a field with high grass. The model of "flying wing" type requires on-board mixer of signals for controlling the elevator and ailerons (for elevons, V-tail mixer is applicable).
2. The servomechanism of the collective pitch of the main rotor of the helicopter's model. It is the main scheme for connecting models of helicopters. Operation of the device is effective both in the repulsion (saving) mode and the altitude holding mode. It is recommended to use the repulsion mode: it also provides an opportunity to hold the helicopter on the fixed altitude. To fix the altitude in the repulsion mode, fly smoothly down to the altitude of 2 m and then provide a command for landing. Otherwise than in a common fly, the helicopter will go down to a certain level, proportional to the provided command for landing, not uninterruptedly. In such a mode, a horizontal flying on a preset low altitude is possible. On the first adjustment of the device, set the degree of response to the altitude in the neutral position; the degree of reaction to the velocity should be in the medium position as well. Then, while flying, adjust the degree of reaction to the velocity in such a way that ensures the minimum vertical vibrations of the model. When the device is used, the rotor's RPM should be the constant (the function of a governor). Application of a fast servo will reduce vertical vibrations of the model. On autorotation, the device itself shall brake the model above the surface of the earth; however, the previous velocity should be controlled manually, otherwise the landing will not be smooth. Flying on a low altitude is bound with a high risk of a wreck - please, take into account this circumstance and do not rely fully on the device only. The holding mode will not operate correctly over an uneven surface, for example, a field with high grass. For installing the device in some model, CCPM mixer of signals for controlling the collective pitch and the washout is required.
3. The servomechanism of flaps for models of planes and gliders. The device can carry out automatic control of flaps. In this case, the repulsion mode with the maximum degree of reaction to the altitude is set. The degree of response to velocity can be the minimum. Automatically lowered flaps reduce the velocity of the flying and increase the ascensional force. Lifting off and landing requires a shorter run-in. On a sudden descent of the model, a sudden repulsion does not occur. The device considerably assists to drive the model on a low altitude. For example, a model with a good aerodynamics can be driven for a long time over a surface of an even field or water. The device does not hold the model; it helps to maintain a relatively constant altitude only. To combine the functions of ailerons and flaps, on-board mixers of controlling signals (spoilerons, such as V-tail mixers) are usable.
4. The servomechanisms of separate flaps for models of planes and gliders. This scheme is applicable for models with the span of wings exceeding 1.5 metres. Two sensors are fixed on the ends of the wings. The same signals for controlling the ailerons and selecting the mode of operation are applied to the input of both sensors via Y-cable (only two channels are used). On tuning the devices, opposite values of the minimum and maximum rates and the same response to altitude are set. The altitude holding mode is not used. In addition to automatic response to the altitude, a dangerous side bank is prevented. For fast and maneuverable models, fast servo should be preferred.
5. Controlling the engine thrust for models of planes and gliders. This scheme is applicable for models with low velocity of flying that increase the altitude on switching-on the engine. Such method of connection is usable for models of paragliders and hang-gliders or for experimental purposes. The mode of the response is repulsion. For landing, the device is switched off via the channel for mode selection.
6. Controlling the engine thrust for models of helicopters. This scheme is applicable for models of helicopters with a fixed pitch of the main rotor. The mode of response is repulsion, the response to the altitude is the maximum and the response to the velocity is the minimum. This method of connection can be usable for simple models of light and non-maneuverable helicopters.
7. Reaction to approaching to an obstacle for any models. Examples of other applications of the device include: automatic changing of routes of movement for robots, cars, and ships; changing of velocity of movement; activation of special signals, fires, sirens, water and pneumatic cannons. If the device is used in small premises or is surrounded by outside things, estimation of the distance can be inaccurate. Such inaccurate estimation of the distance is caused by multiple reflection of ultrasonic signal from the surrounding outside objects.
Installing and adjusting the device
The device is mounted on the body of the model with the sensor directed downwards. On models of planes and gliders, the mark "Front" should be oriented forwards. No elements of the construction should block the sensor. On uprising and landing, no sand and moister should get into the sensor. Before flying, the device should be adjusted. Connect the device according to the chosen scheme (see the previous sub-section). Prior to adjusting the device, the trimmer on the control panel and any other limiters of the control channel shall be switched off to ensure a deflection of the servo to the maximum value possible while flying. On switching-on the on-board power supply, hold the button on the device pressed (the button is pressed through the elastic film in the specified point). After release of the button, the LED of the device will flash with a long interval. On the control panel, set the control stick of the chosen channel to the position that corresponds to the maximum descent and press the button once more. Now the LED shall flash twice in turn. Set the control stick of the chosen channel on the panel to the position that corresponds to the maximum increase of the altitude and press the button once more. Now the LED shall flash frequently. Then the degree of response of the device to the parameter of altitude in the repulsion mode should be set. The position of the control stick that corresponds to descent means an absence of any response to the altitude, and the position of the control stick that corresponds to uprising means the maximum deflection of the servo proportional to decrease of the altitude. For probative flying, set the stick to the neutral position and press the button once more. Now the device is activated and operates in the mode set by the additional control channel. The neutral signal of the channel for mode controlling means an absence of any response. A change of the signal towards its reduction activates the repulsion mode with the response to the altitude that conforms to the preset value; the response to the vertical velocity will be proportional to the deflection of the signal of the additional channel from the neutral position. The value of the additional channel's signal is finally adjusted on probative flies. The goal of adjustment is ensuring a stable flying of the model in the required mode. The response of the device to approaching should be sufficient and its waving-like vibrations should be the minimum. The data on conformity of the mode of operation to the signal of the control channel are provided in the table below.
On operation of the device, the frequency of flashing of its LED on its body conforms to the altitude to be identified. If the LED does not flash, the altitude exceeds 2.5 m; if the LED lights permanently, the distance is less than 0.2 m. If the LED activates on the altitude over 2.5 m or the manner of flying of the model attests a response of the device to an obstacle that actually does not exist, this means an activation of the device by outside noise. In such a case, the device should be switched out from the control panel (by the neutral signal of the additional control channel) and the model should be landed. First of all, measures for reducing the noise and vibrations that affect the device should be taken. Fix the device in a larger distance from the engine, use soft gaskets or fix it on rubber shock absorbers as offered in the figure:
Then, striving to avoid the impact of external noises upon the operation of the device, its sensitivity should be reduced. It is carried out as follows:
1. Activate the model
2. Turn it in such a manner that ensures an absence of any obstacles before the sensors in the distance of three metres.
3. Press the button on the body of the sensor
4. Holding the button pressed, activate the engine for the full power.
5. Release the button
The device will save the level of this noise and will not provide a response to it anymore. If the activated model cannot be adjusted in the said manner or such adjustment is not sufficient, a limitation of sensitivity can be performed without starting-up the engine. It is carried out as follows:
1. Switch-on the control panel and the on-board devices of the model
2. Direct the sensor to the surface of earth or to walls in the manner that ensures an absence of other objects in the zone under control.
3. The distance to the surface will predetermine the limit of sensitivity.
4. Press and release the button on the body of the device.
If the distance exceeds 2.5 metres and the LED does not flash, pressing the button will fix the maximum sensitivity. The less the distance and the higher frequency of the LED's flashing are, the less sensitivity will be set by pressing the button. Each pressing the button sets a new value of sensitivity.
Reduction of sensitivity means that the ability of the device to identify the distance exceeding the set limit will become worse. Non-reliable identification of the distance will express itself by strong jerks of the servo on landing. On a considerable limitation of sensitivity, the mode of altitude holding should not be applied.
Any setting of the device will be preserved on switching-off the power supply.
Causes of incorrect operation and damage of the device can include jammed sensors, moisture, incorrect connection to power supply, fall of the supply voltage below 4.5V, and strokes.
Technical data:
Connection: between the on-board R/C receiver and the servomechanism plus a supplemental control channel for mode selection.
Remote mode selection: switched off / holding / repulsion
Response: proportional to the altitude and the vertical velocity
Power supply: 4.5 to 5.5V from the receiver
consumption current - 25mA
Altitude sensor: ultrasonic
Directivity: 60 degrees
Controllable altitudes: from 0.2 m to 2.4 m
Altitude of the hold mode: 1.8 m
Length of conductors: 25 cm
Sizes of the sensor: 65*18*18mm:
Weight: 16g
PCB & Firmware
Schematic:
PCB: 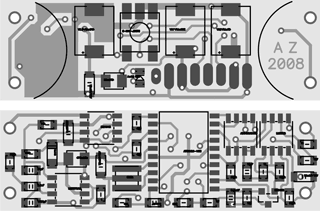
Firmware